Showing posts with label bread. Show all posts

April 16, 2012

Sweet and Sourdough Muffins


I had an extra cup of sourdough starter hanging around and about 30 minutes in which to use it.  The solution?  Muffins!  Muffins are perfect.  Fast, simple, and you can have endless variety.  I went with cheesy muffins this time, but I was very close to doing a cranberry one.  Next week, maybe!

Ingredients

1 c sourdough starter
1 c bread flour
1/2 c sugar
dash salt
1 t baking soda
1 egg
1/4 c oil
1/2 c shredded cheddar cheese.  Or fruit.  Or nuts.  Or whatever your little heart desires!

Combine all ingredients.  Grease muffin tin and fill cups about 2/3s full (this made 9 muffins for me).  Bake at 430 for 20 minutes.

January 18, 2012

Chili Rellenos


I apologize for the long hiatus, but we spent all of December moving again.  We're still not all unpacked here at the new place, but I made the kitchen a priority.  It's the only room in the house that is 100% functional.  With that said, I'll kick off my return to blogging with this month's HH6 challenge (due to the holidays there was no December challenge so I didn't miss one)!

Prepare a dish that you have never made before but always wanted to try.  Tell us why you have taken quite some time to make this dish.

Back in August of 2009, just before school started (you know, the days the teachers are there working but the kids aren't), I remember going out to lunch with my co-workers.  We headed to Mexican place down the street.  I had the chili rellenos.  I'm not sure how the conversation ended up where it did, but I made some comment about how it was probably hard to make chili rellenos or something along those lines.  One of my friends then pointed out that I was no slouch in the kitchen and certainly I could make chili rellenos if I wanted to.  Huh, I thought to myself, I guess I could!  So I decided that I would learn to make chili rellenos by the end of the year.

Yeah, that never happened.

I did go and read up on how to make them and I think that intimidated me.  It seemed like a whole lot of steps, between roasting and skinning the chili and making the batter and the tendency of things to go horribly, horribly wrong when I have hot oil around... So the whole thing sort of fell to the wayside.  Until I got this challenge in my email, that is.  So I began researching once more and as soon as I had the kitchen put to rights, I whipped out the frying oil and dove right in.

Honestly, it wasn't all that difficult.  The batter got nice and crispy, the poblano was tender, the salsa perfectly spicy.  I think I'll continue questing for a different sauce, but other than that both The Husband and I enjoyed this dinner very much.

One of the big decisions in making a chili relleno is what to stuff them with.  Cheese is, of course, the standard.  But why be boring?  I happened to have some pulled pork on hand (the first thing I did when I got my Traeger back was smoke a pork butt!) so I mixed that up with some spinach and grated cheese to make the filling.  Be creative!

The basic recipe came from Macheesmo, whom I had never heard of before.  They're really awesome though - go check them out!

Ingredients

1 poblano pepper per person, plus one extra
1 head garlic, peeled
4 tomatoes
1 jalapeno, seeded and halved
1/2 onion, quartered
1 lime
1 c flour
1/2 c beer
4 eggs, separated
vegetable oil

Filling
handful pulled pork
grated mozzarella and cheddar
handful of spinach, coarsely chopped

Preheat oven to 450.  Spread the poblanos, garlic, tomatoes, jalapeno and onion out on a baking sheet and roast until tender, turning the poblanos every few minutes.  If some things are cooking faster than others, pull them out early.  It should take about 30-40 minutes.

Carefully place one poblano per person into a plastic or paper bag.  Fold up and set aside to steam.

Combine the remaining poblano with all the other roasted goodness in a food processor.  Squeeze in the lime juice and process briefly until you have salsa!  Set aside.

Combine your filling ingredients in a bowl.

Now, back to the poblanos.  This is a bit tricky, so be very careful with every step here!  Remove the poblanos from the bag.  Peel the skin off, but don't tear the pepper!  It's ok if there's a bit of skin left on there.  Then make a small slice along the side.  Reach in and cut/scoop out all of the seeds.

Time to make the batter!  Mix egg yolks, flour and beer together in a bowl.  In another bowl, whip your egg whites until frothy.  Carefully fold the whites into the flour mixture, keeping as many air bubbles as possible.

Stuff the peppers!  Gently fill each pepper with your stuffing mix.  Don't over fill!

Heat oil in a skillet.  You should have about 1/4 inch of oil in the bottom.  Once it is hot, carefully dip the stuffed peppers in the batter.  Lay in the skillet seam side down.  After 2-3 minutes, turn and fry the other side.

Drain on paper towels.  Serve with salsa spooned over top.

November 30, 2011

Thanksgiving Roundup 2011


So... Thanksgiving.  Yeah.  I started out awesome and took pictures of my cute appetizers (I particularly like the turkey-shaped veggie platter!), but after that my poor camera sat neglected on a side-table while I got distracted with cooking, serving and eating!  On one hand I'm sad because the food was beautiful and delicious.  On the other hand though, we're TDY en-route here which is secret code for "All of my nice stuff is in South Carolina and we're eating off of paper plates," so the plating wouldn't have looked so good.  I mean, I roasted the turkey in one of those tin-foil pans from the commissary which also doubled as our cutting board (bad idea, by the way, never ever do that).

Anyway, here's the breakdown of our Thanksgiving dinner:

Like last year, I used Alton Brown's brine for my turkey.  I don't have my smoker here though, so oven roasted it was!  I rubbed it with Memphis BBQ's Magic Dust and it was the juiciest bird ever!  Next year it will be a hard choice between smoking and oven roasting - we might need two birds!

Making repeat appearances at our table this year were the Olive Bread, Rosemary Epi, Mashed Potatoes, and Magic Pumpkin Pie.

New guests to the menu were Apple-Sausage Stuffing, Corn Casserole, and Bobby Flay's Pumpkin Bread Pudding (add some dried cranberries to the pumpkin bread).  I also made my own pie crust thanks to Cooks Illustrated and my good friend Stacey!  Smitten Kitchen has already blogged about it, so I will leave you in their capable hands.

Onto the stuffing!

I have a confession to make.  I kinda like stovetop stuffing.  There, I said it.  But Thanksgiving is Thanksgiving and one simply cannot have stovetop stuffing, even if it is really really good.  So I ended up heavily modifying Double Musky's Sausage-Apple Dressing.  As always, the key to a good stuffing is a really good stock.  It MUST be homemade!  If you want to know why, Stacey has the answer.  It's worth it to buy some turkey necks and make up a large batch of stock prior to Thanksgiving - you need it for gravy too!  Also, for bread crumbs, just get (or make) some good bread and leave it out for a day before shredding it.  I used 1/2 sourdough bread and 1/2 wheat.

Ingredients

1 T oil
1 head garlic, minced
1/2 onion, diced
1/2 tube ground sausage
Poultry seasoning
3-4 stalks celery, diced
1/4 c mixed bell peppers, diced
1 ancho chili, diced (optional)
1 granny smith apple, diced
dash nutmeg
1/2-1 c turkey stock
3-4 c bread crumbs

In a skillet, saute the garlic and onion in the oil until onion is translucent.  Add the sausage and brown, using poultry seasoning to taste.  Transfer to a pot and stir in the celery, peppers, apple and nutmeg.  Cook for two minutes, then add the stock (start with 1/2 cup, use more if needed).  Simmer for another 2-3 minutes and stir in the bread crumbs.  Adjust bread and stock until you reach the desired consistency.  Remove from heat.  Transfer to oven-safe pan and cook until the top is toasted.

PS.  We're starting the second half of our PCS shortly, so updates will be unreliable until we've moved into our new place sometime after Christmas.  Have a happy and safe holiday!!

November 16, 2011

Trail Bread


Sorry for the slow posting lately!  Things are starting to get a bit hectic around here - I just spent a week backpacking in the Grand Canyon, and am rushing to finish this months HH6 challenge while also prepping for Thanksgiving and then the movers will be here in less than three weeks and we're off across the country once more!

I've been meaning to post this particular recipe for months now.  The picture isn't all that good, and I didn't think to get a shot of us actually eating this bread in the canyon!  Anyway, this is a variation on a recipe from Alaska Roadhouse Recipes.  It's definitely not an every-day bread - each piece packs about 400 calories (I haven't done the exact math)!  But when you're doing long hikes and backpacking, you really need the extra fuel.  In addition to being calorie dense, durable and lightweight, this trail bread is also delicious, sweetened with molasses and honey.  This is a bonus for me, because sometimes when I'm burning that many calories I start not wanting to eat, but I'd never turn down a piece of this bread!

Ingredients

4 c whole wheat flour
1 c water
3/4 c brown sugar
1/2 c honey
1/4 c olive oil
1/4 c molasses
3 T powdered milk
1 1/2 t baking soda
1/3 c chopped nuts
1/3 c dried fruit
1/8 c chocolate chips

Mix everything together.  Pour into greased pan.  Bake at 350 for 40-50 minutes or until a toothpick comes out clean.  Cut into 12-16 pieces.

August 10, 2011

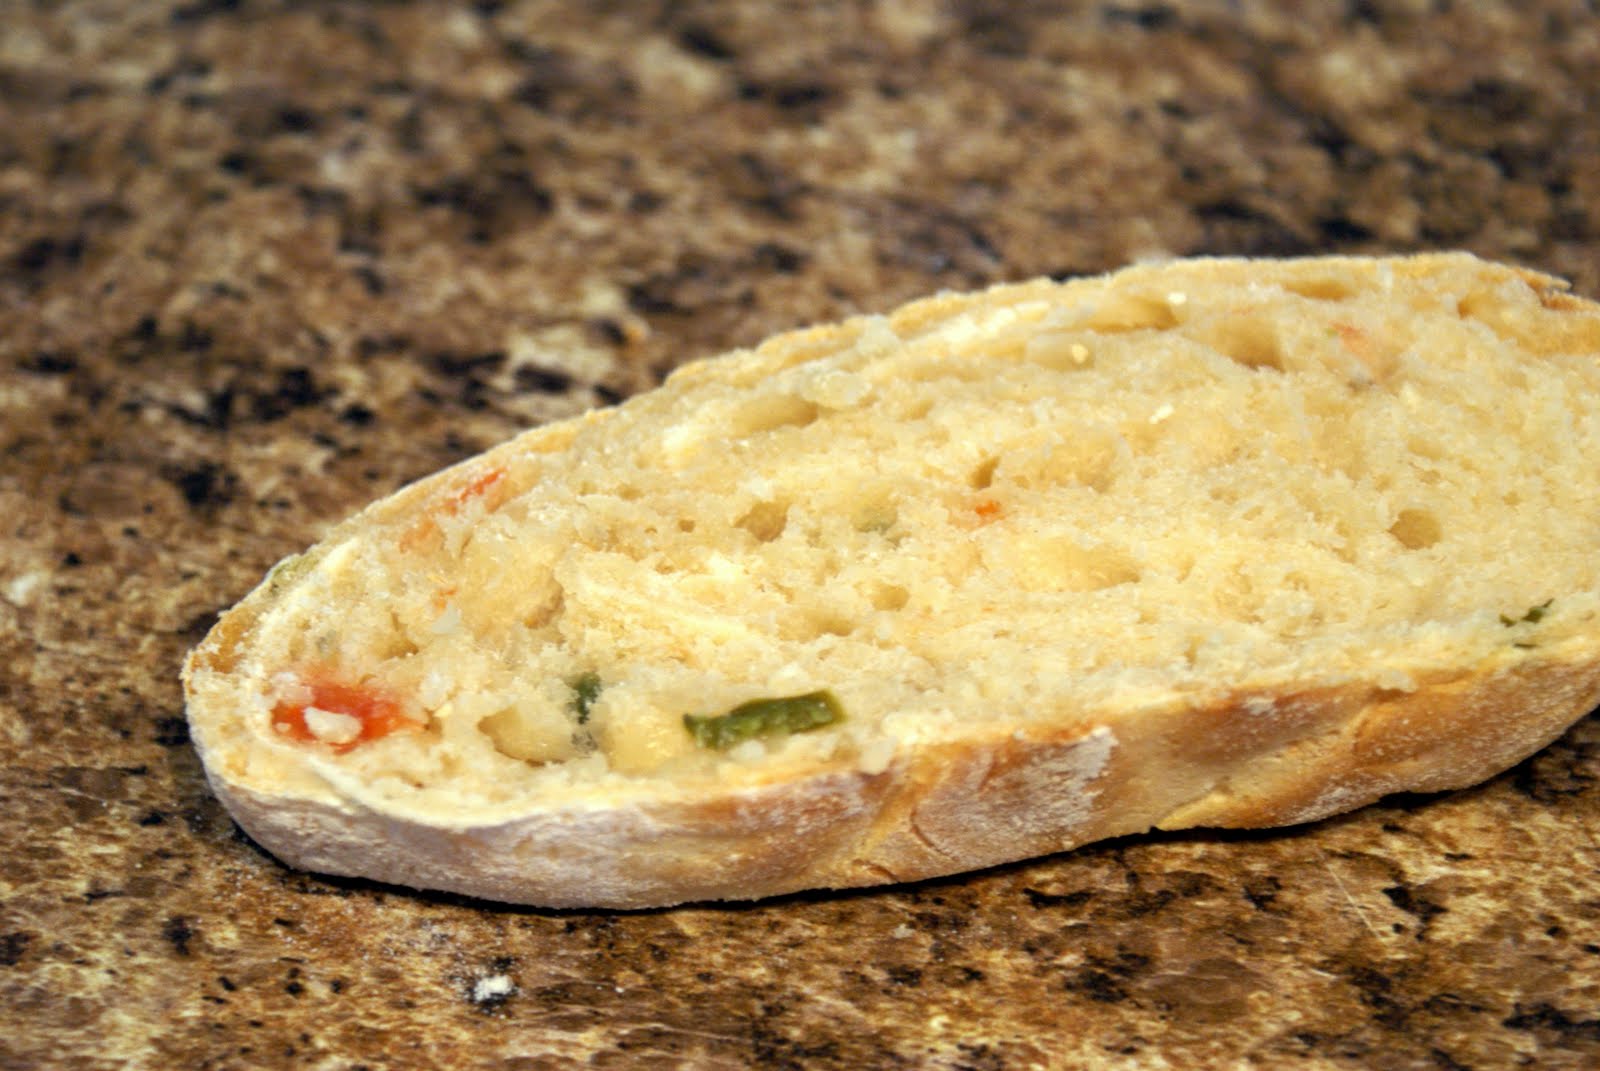
Roasted Tomato, Garlic, and Ancho Chili Bread


Today, I was bored.  And when I'm bored, I bake things.  Now, I really need to get a sourdough starter going so that I can finish off the Bread Baker's Apprentice Challenge, and I intend to start that tomorrow, but today I needed instant gratification.  At first I considered a variation on BBA's Potato Rosemary bread, being as it is fantastic, but I didn't have the time to do the pre-ferment, nor did I have potatoes or rosemary.  What to do??

Then I came up with this idea, after looking through my refrigerator.  It would be amazing, using some ingredients that needed to be used or they would go bad.  The spiciness of the chili would compensate for the lack of a pre-ferement.  All I needed to do was come up with the formula.

I was not certain this would work.  I've never dared to come up with a formula all on my own.  But I was hungry.  So I went for it, and the results were all I could wish for!

From the beginning, I intended for this to be a wet dough, cooked in a pot like the famous No-Knead Bread.  As it happens, I seem to be lacking in oven-safe pots.  So I ended up treating this more like a ciabatta, and it worked out!

Ingredients

1/2 head garlic
olive oil
12 grape tomatoes
1 ancho chili, diced
3 c flour
3/4 t salt
1/2 t yeast
1/4 c hot water
1 c water

Preheat oven to 350.  Wrap garlic in tinfoil with a spash of olive oil and roast for 40 minutes.  Add the tomatoes when there is 20 minutes left.

Let garlic and tomatoes cool.  Peel garlic and dice.  Skin tomatoes and dice.

Combine flour, salt, garlic, tomatoes, and chili in a stand mixer.  Separately, mix yeast and 1/4 c water.  Wait 10 minutes or until yeast is frothy.  Add to flour mix along with 1 c water.

With paddle, blend for 1 minute.  Switch to dough hook and mix for 5-8 minutes or until dough is well blended.  Dough should be quite sticky, clinging to bottom and sides.

Transfer into greased bowl, cover and let rise 1 hour.

Stir down.  Place bed of flour on counter and transfer dough.  Fold loosely and spray with oil and cover.  Rise again, 1 hour.

Meanwhile, preheat oven to 515.  When oven is hot, carefully transfer dough to baking sheet.

Bake 5 minutes, then reduce heat to 425.  Bake 10 minutes, then turn 180 degrees, continue baking 10-15 minutes or until loaf registers 205.

May 18, 2011

Crab Cake Pizza

A few weeks ago, The Husband and I were down on the Kenai looking for bears.  Long story short, we were unsuccessful, but we did find ourselves spending a night in Seward, one of our favorite towns.  I really wanted to spend some time there before we PCSed, so I was pretty excited.  After heading down to Lowell Point to look for sea otters (they obliged!) we wandered through town debating where to eat for dinner.  We finally settled on a particular place based on the fact that they had halibut cheeks on their menu.  If you've never had halibut cheeks, you are Missing Out.  It is, without a doubt, the best part of the fish, deliciously tender.  Of course, each fish only has two, and we'd eaten our last for Christmas.  Since it's nearly impossible to get cheeks outside of the state, I wanted some!

Anyway, we choose poorly.  I hadn't realized it was POSSIBLE to ruin halibut cheeks, but they did, and it made me very sad!  They also ruined the seafood salad we had.

Fortunately, I'd splurged and ordered an appetizer of king crab cakes.  Unlike the rest of our meal, they were fantastic!  So good that I fantasized about them all the way home.

Then, it occurred to me.  This month's HH6 challenge was to make a pizza without tomato sauce.

Crab cake.  Pizza.  The two terms sounded strange together, but I KNEW they would be delicious.

I was right.

Ingredients

Pizza Dough (Peter Reinhart's version, or use your own)

4 1/2 c flour
1 3/4 t salt
1 t yeast
1/4 c olive oil
1 3/4 c ice cold water

Blend ingredients into a smooth dough (5-7 minutes with dough hook).  Divide into 6 pieces and refrigerate overnight.  You can also freeze the dough at this point.  On the day you make the pizza, pull out the dough at least two hours before.  Pat it into a rough oval, cover, and rest for two hours.


Roasted Red Pepper Aioli

1 red pepper
1/4 c mayo
1 clove garlic
dash onion powder
dash cayenne
1 T lemon juice

Roast the pepper, either in the oven or on the grill.  Peel off skin and discard seeds.  Place pepper in food processor with other ingredients until sauce forms.


Topping

1 leg king crab (or equivelant of other crab, but red king is best! ...I love Alaska!)
1/4 c diced celery
1/4 c mayo
1 T Dijon mustard
dash onion powder
dash hot sauce
1/4-1/2 c panko crumbs
1/8 c shredded Parmesan or asiago cheese

Place pizza stone in oven and preheat to 550 or as high as it will go.

Gently stir first six ingredients together.  Fold in about half of the bread crumbs.

Roll pizza dough out to the desired size.  Spread a thin layer of aioli across.  Top with crab mixture and sprinkle with the remaining panko and cheese.  Transfer to pizza stone and bake 5-8 minutes or until golden brown.

May 17, 2011

Better Beer Batter

I have but recently made a fantastic discovery: Panko bread crumbs.  They are magic!  Today, I used them with beer batter to fry up some leftover salmon.  To die for!

Ingredients

1 T cornstarch
1 c flour
1 1/2 c ice cold beer
2 c panko bread crumbs
oil for frying
fish, cut into bite-sized pieces

Blend the cornstarch, flour and beer together to make a batter.  Heat oil to between 325 and 350.  Dip fish into batter, gently roll in bread crumbs, then fry for about 60 seconds per side, depending on the size of your pieces. Drain and enjoy!

April 22, 2011

Sausage Rolls

 One summer during college, we took a family vacation to Ireland.  Actually, now that I think about it, that was our last real family vacation, since shortly after graduation I moved out, got married, and moved across the country.  Anyway, one morning we were wandering around Dublin and stopped in a bakery for breakfast.  Everyone else got some sort of sweet pastry, but I prefer savory food and opted for the sausage roll.

This sausage roll was a piece of heaven in hand-held form.

The bread was flaky and sweet, the sausage perfectly spicy, with a little bit of cheese.  Since bread, meat and cheese are my favorite food groups, this was perfect!

In 2009, I was working my way through the Bread Bakers Apprentice challenge (I've stalled out on the sourdoughs but I really do intend to finish!) and came across Peter Reinhart's Casiatello.  As soon as I took a bite, it called to mind that Irish sausage roll - but it wasn't quite right.  I was onto something, though!  I planned to go back and make some changes to the recipe to make it more like that tasty little roll, but never got around to it.

This months HH6 challenge, however, is to recreate a dish from another country, and it got me up off my butt and working on my sausage roll.

I used Peter Reinhart's recipe as a base, but I have made some definite changes to make it more like my memory of Ireland.  This bread is fairly simple to make, and quite quick as far as bread is concerned.  It takes about 5 hours from start to finish, with several nicely placed breaks to allow for running errands.


Regarding cheese and salami:  These will make or break your bread - I made a special trip to the artisan cheese and salami shop just for this bread (twist my arm, why don't you?).  You want a cheese that will melt nicely, but has a good flavor as well.  Good flavor, but not necessarily strong.  The salami will do that.  I blended about 20% emmenthaler with 80% Wagon Wheel from Cowgirl Creamery.  The Wagon Wheel worked wonders, and if you have access to it, use it!  For the salami, I used half Da Vino, which is a red-wine salami, and half Finocchiona, which is - get this - curry salami.  Don't be shy with the salami either.  4oz will seem like a lot, but you need it all!

Ingredients

1/2 hot water
1 T yeast
1/2 c flour
3/4 c milk

3 1/2 c flour
1 t salt
1 T sugar
2 eggs
3/4 c butter

4 oz salami, chopped and lightly sauteed
1 c cheese, coarsely chopped or shredded

1 package Lil' Smokies

 (The Husband got me a kitchen aid for my birthday!  Isn't he the best?)

Sponge
Mix the hot water and yeast together.  Set aside for five minutes or until frothy.  In a small bowl, stir together 1/2 c flour, milk, and yeast mix.  Cover with plastic wrap and rest for one hour.

Dough
In your kitchenaid (or a medium bowl), combine the 3 1/2 c flour, salt and sugar.  Stir in the eggs and the sponge until the dough forms a coarse ball.  Rest for 10 minutes.

Cut the butter into four pieces.  Begin to work them into the dough one at a time, either stirring or mixing with the paddle attachment at medium speed (this is where a kitchenaid ROCKS!).  The butter MUST be completely blended.  This is important!

Once all of the butter is completely blended, begin kneading the bread.  If using a mixer, use the paddle for four minutes, then switch to the dough hook for another 5-8.

Once the dough has smoothed out and isn't quite so sticky, stir or mix in the chopped salami and cheese until evenly distributed.

Oil a large bowl and transfer the dough.  Cover with plastic wrap and rest 90 minutes.

Now, to shape the dough.  Use any of the following: muffin pan, mini-cheesecake pan, or a round pie pan.  Whichever you use, grease the pan!

Divide the dough into SMALL pieces and carefully wrap around one lil' smokie.  If using muffin or mini cheesecake pans, place one bundle in each well.  If using a pie pan, cluster the rolls so they are not quite touching.

Mist the tops of the dough with oil and cover with plastic wrap.  Let rest 60 minutes.

Preheat oven to 350.

Bake for 20 minutes.  Turn pans and continue baking another 10-20 minutes, or until rolls are nicely browned and cheese is bubbling out the top.  Cool before eating...if you can resist!

March 8, 2011

Pecan Pie Cookies and Bananas Foster Pastry


As I mentioned in an earlier post, each month the HH6 club puts out a cooking challenge.  The challenge for March was to come up with a concept dish for an MRE.  For those of you who do not hail from the military world, an MRE (meal ready to eat) is a box of portable, lightweight rations designed to support military members in locations where chow halls aren't readily available. 

MREs are not (despite some misconceptions) dehydrated or freeze dried.  They are actually preserved using a variation on the canning technique.  The pouch containing the food is not plastic, but more thin layers of aluminum which can be sealed airtight and processed the same way you would process canned fruits or veggies.  While this yields a significantly heavier ration (due to water content) than dehydrated or freeze-dried food, it is quicker to prepare and can even be eaten with no preparation at all if time is an issue (and in combat, it certainly could be!).

Since MREs are more canned food than backpacking food, there are actually a lot fewer restrictions in the food composition than you might otherwise have.  For example, you can have larger pieces of meat than if you were dehydrating the food first.  Still, canning tends to work best with "saucy" type things.  Rice is notoriously difficult, though apparently the military has figured that one out already!

MREs used to be, to put it plainly, awful.  In recent years as the preservative technology has advanced, they've become quite edible - though the menu choices are still fairly boring.  Click here to see the 2011 entree list.

See why we want to spice it up?

Here's a picture of the contents of a Beef Ravioli MRE.

Included:

Beef Ravioli
Beef Snack Stick
Vegetable Crackers
Jalapeno Cheese Spread
Toffee Cookies
Chocolate Chip Toaster Pastry
Orange Flavored Electrolyte drink mix
Acessory Pack
          o Xylitol chewing gum
          o Water-resistant matchbook
          o Napkin / toilet paper
          o Moist towelette
          o Seasonings, including salt, pepper, sugar, creamer, and/or Tabasco sauce


A common complaint about MREs stems from a very significant lack of fiber.  Most MREs are lucky to contain less than half the fiber that they ought to.  I plan to address this with my concept MRE.

Concept MRE: Mardi Gras Edition!

Chicken Etouffe
Whole-grain Cajun Rice
Wheat Crackers with Maple Pepper
Hard Aged Cheddar slices
Pecan Pie Cookies
Bananas Foster Pastry
Hurricane Flavored Electrolyte drink mix

Yes, we're going with the Mardi Gras theme here!  Let's break it down a bit.

Chicken Etouffe

I already blogged this recipe here.  It's fantastic and flavorful (unlike most MREs!), but not overly spicy.  I don't know anyone who doesn't like etouffe!  Traditionally you would see shrimp etouffe.  Apart from my undying hatred of shrimp, I went with chicken because eating canned meat is moderately less pleasant than eating fresh meat, but eating canned seafood is just plain nasty.


Whole-grain Cajun Rice


It's not etouffe if you aren't eating it over rice.  Plus, it's a great way to sneak a few veggies in, not to mention the fiber from whole grains.  I mentioned earlier that canning rice is very difficult, but since the MRE gods have already figured this one out, I'll leave the logistics to them.


Wheat Crackers with Maple Peppe
r

MREs already feature crackers quite regularly.  Seems like it would be pretty easy to just use wheat instead of white (with more fiber to boot!), and maple pepper sounds odd but is to die for on crackers.  See a fancier version here.


Hard Aged Cheddar Slices

Away with that nasty faux-cheese spread!  Dairy products are not recommended for canning by the FDA, but a good hard cheddar can (and is!) aged for years in parafin.  It'll last as long as the MRE will, and will just get better as time goes by.


Pecan Pie Cookies:

These tasty little treats are hand-held, durable versions of the traditional southern dessert.  A little chocolate brings out the flavor and you'll never notice the wheat flour - but you'll get the fiber!  Hat-tip to allrecipes for the base.

Ingredients (makes 6-8 cookies)

Cookie

3/4 c flour
1/4 c wheat flour
1 t baking powder
1/2 c brown sugar
6 T butter
1/2 egg
1 t vanilla

Filling

2 T butter
1/4 c powdered sugar
1 1/2 T honey
1/2 t vanilla
1 t dark rum
1 t cocoa powder
1/4 c chopped pecans

Melt the butter.  Stir in the sugar, honey, vanilla, rum, and cocoa.  Once all the ingredients are blended, mix in the pecans.  Set aside.

Preheat oven to 350.

Whip the butter, sugar, egg and vanilla, then slowly beat in the flours and baking powder until dough forms.

Spoon dough into cupcake tins.  Use your fingers to form the dough into a "cup" running about 1/4 to 1/2 inch up the walls of the tin.  Fill each cup with 1 t filling.  Bake 13 minutes.


Bananas Foster Pastry
This recipe is the only one that would need to be significantly altered before being incorporated into an MRE.  However, since they already include various flavors of toaster pastry, it should be easy for them to make a bananas foster version.

Ingredients (makes 3)


1 sheet puff pastry
2 bananas
1/4 c butter
1 c brown sugar
1 t cinnamon
1/4 c tuaca or other fruit-flavored liquor
1/4 c dark rum

Cut the pastry sheet into nine squares.  Preheat oven to 350.

Melt the butter in a saucepan.  Add the brown sugar and cinnamon, stirring until well dissolved.  Add the liquor and carefully flambee until the alcohol is burned off.  Add in the bananas and cook for 5-10 minutes.  Remove bananas and slice thinly.

Grease a sheet pan.  Lay out three squares of puff pastry.  Place 3-5 (depending on thickness) slices on each sheet of puff pastry.  Spoon over some sauce, then cover each with another sheet of pastry.  Add bananas and sauce again, then cover with the final slices of puff pastry.

Bake for 20-30 minutes.  You may have to turn the tray to ensure even browning.

Serve with icecream, drizzle with any remaining sauce.

Hurricane Flavored Electrolyte drink mix

Come on, if they can make orange and lime flavors, they can make hurricane flavors!  Heck, I'm pretty sure Jello had a hurricane flavored mix a few years back.

February 6, 2011

Pizza Roulade and ABTs

It's not the Superbowl without Manfood - meat, cheese, and smoke!

ABTs

Ingredients

Jalapenos
Cream cheese
Lil' smokies
bacon
seasonings of your choice

Slice jalapenos in half lengthwise.  Remove seeds.  Season the cream cheese and spread it in each half of jalapeno.  Lay a lil' smoky on top, then wrap the whole thing in bacon.  Smoke at 250 until the pepper is soft and the bacon crispy.

Pizza Roulade

Ingredients

1 sheet puff pastry, thawed
1/2 tube of ground sausage
1/2 bag pepperoni
1/2 bag shredded mozzarella
1 roma tomato, diced
1 egg white
garlic
oregano
crushed red pepper
Parmesan cheese

Brown the sausage with garlic and oregano.  Drain and place in a bowl to cool.  Meanwhile, roll out the puff pastry until it has doubled in size.  Into the ground sausage, stir pepperoni, tomato and mozzarella with additional oregano and garlic.  Place this mixture on the bottom third of the puff pastry and carefully roll it up, sealing the edges.  Lay seam down on pan.

Mix the egg white with some garlic, oregano, and crushed red pepper.  Brush over the roulade.  Sprinkle Parmesan cheese on top.

Smoke at 250 until browned and crispy.

Alternate Roulade: "Women Food"

Instead of the meat and mozzarella stuffing, try this for your next luncheon!  Puree 1/2 bag of baby spinach with a bit of oil, pepper, oregano and garlic.  Stir in some crumbled feta and shredded chicken.  Mix in one egg to bind, and continue with the roulade.  It's a guaranteed hit at your next luncheon!


December 5, 2010

Beer Batter Bonanza

I hope you all had a great Thanksgiving!  Ours was tons of fun.  I didn't do anything this year that I haven't already posted, so you'll have to forgive me for forgetting to take pictures.  Instead, I have other delicious things for you.

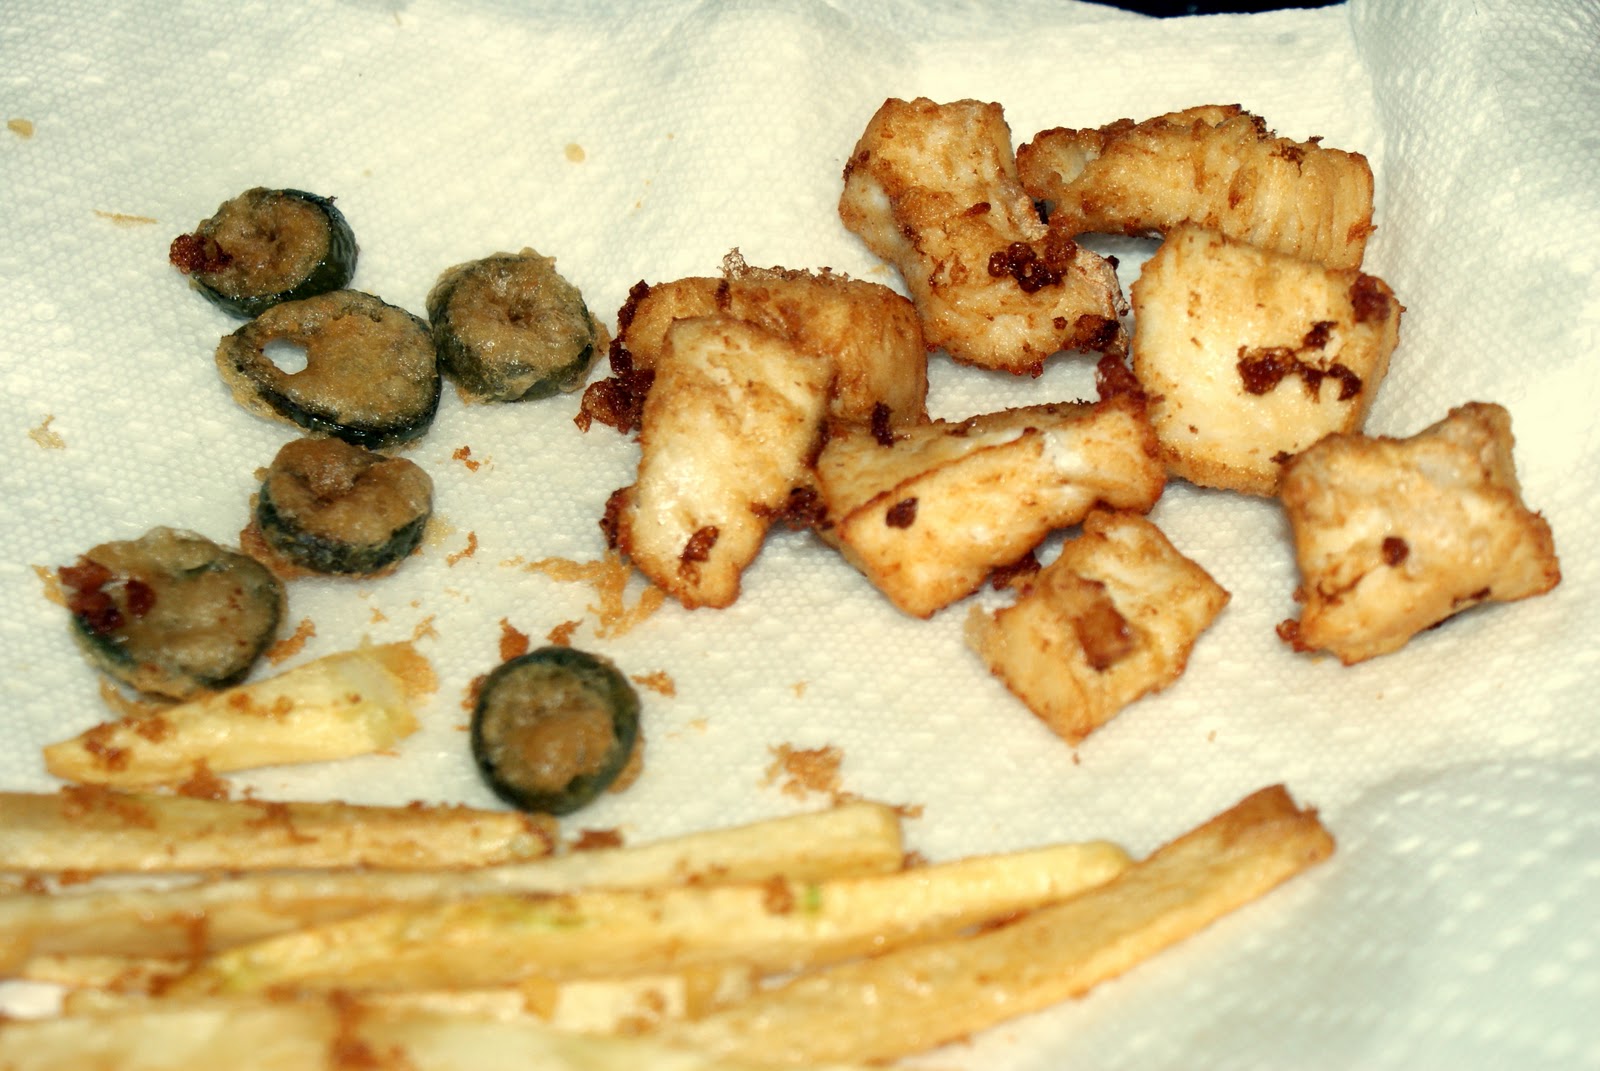
I was having sort of a bad day the other day, so I decided to fry some food.  I used this beer batter for halibut, jalapeno peppers, and french fries.  It's absolutely fantastic!  Make sure your oil is at the right temperature, though, and don't overload your pot, no matter how tempting it is!  Also, if your husband decides that it would be a good idea to cool down the hot oil by throwing ice cubes in it, DO NOT LET HIM.  Trust me.

Ingredients

1/4 c flour
2 t baking soda
1 egg
1/2 bottle beer (drink the other half!)
seasoned flour (salt and pepper, plus any other herbs you'd like.  Oregano is good, as is cayenne.)

Mix all but the seasoned flour together.  The batter should be about the consistency of heavy cream - use the beer to adjust the consistency.

For french fries, after cutting the potato, store them in water to keep them from discoloring.  Halibut is great in bite sized chunks or longer strips.  Jalapenos should be sliced into coins.

Heat oil to 350.  Dip halibut and jalapenos into flour, then coat with batter and carefully place in the oil.  French fries can just be dipped right into the batter.  Cook approximately 2 minutes on a side.

March 26, 2010

Cheesy Halibut Spread

I'm still trying to work my way through the 48lbs of halibut my friend and I came home with last summer. I think I've come far enough that the fish is (almost) confined to one shelf in the freezer! Of course, that means I still have over 20lbs to go. Anyway, I got the bones of this recipe from Kasilof Seafoods. This would make a nice little appetizer, served on baguette rounds. I had mine on the marbled rye I made for the BBA challenge.

Ingredients

1/4 lb cooked, shredded halibut
1/2 red bell pepper, diced
1 pearl onion, diced
1 handful baby spinach, diced
1/2 c shredded cheddar cheese
2-3 T mayonnaise
Several small pieces of sliced bread
garlic, salt, pepper to taste

Preheat oven to 350. Mix the halibut, pepper, onion and spinach together with half the cheese. Stir in just enough mayo to reach your preferred consistency. Add seasoning to taste. Spoon the spread onto the bread, topping with the remaining cheese. Bake until the cheese is melted and browned. Serve warm.

February 6, 2010

Pitas

Having become a recent fan of hummus, the next logical step was to try my hand at pitas. My first attempt was an utter failure - my second, a success. I'm not sure if the success was due to the changes I made in the recipe, or just experience, but who cares? They're delicious! Especially fantastic when stuffed with spicy hummus and baby spinach! As an added bonus, this is probably one of the most fun breads to make, since you get to watching it puff up in the oven. Thanks to the Fresh Loaf for the basic recipe.

Ingredients

1 c wheat flour
1 c all-purpose flour
1 c bread flour
1 1/2 t salt
1 T honey
1 packet yeast
1 1/2 c water

If using active dry yeast, activate it in warm water.

Meanwhile, mix the flours and salts together, then add the honey, water, and yeast. Stir until a loose ball forms. Remove to a floured surface and knead for about 10 minutes. Form into a boule. Grease a bowl and roll the dough in it to coat the dough with oil. Cover with plastic wrap and let rise until doubled, approximately 90 minutes.

Gently degass the dough and divide into six even pieces. Shape each section into a small boule, cover with plastic wrap and let sit for 20 minutes. Meanwhile, place a stone or an upside down cookie sheet in the oven and preheat the oven to at least 500. Hotter is better!

After the dough has relaxed, gently roll each section into thin circles. They should be between 1/8 and 1/4 inch thick.

Bake pitas 2 at a time on the stone or cookie sheet. They should puff up in 3-5 minutes. Remember, opening the oven allows heat to escape, so wait several minutes between batches.

December 30, 2009

Ebelskivers

For Christmas, I got an ebelskiver pan. Ebelskivers are basically just filled pancakes. For those who know me, pancakes are my weakness. I never get them right! In the evelskiver though, I hoped to find a pancake I could make. Now, the awesome thing about them is that you can fill them with just about anything! The pan has seven holes. You put a little batter in the bottom, then a little filling, then top with the batter. Turning them took a little getting used to, but I'm already better at it than I am at flipping normal pancakes.

The ones pictured here are the pizza ebelskivers. They came out quite beautiful, with the pepperoni peeking through. I've also made cheesesteak ebelskivers and cinnamon apple ebelskivers.

Ingredients

Pancake batter
Italian seasoning
Pepperonis
Marinated mozarella balls
Marinara sauce

Season the pancake batter with Italian seasoning instead of sugar. Grease the pan and heat over medium low heat. Place a pepperoni in the bottom of each well. When the pan is hot, add one spoon of batter to each well. Working quickly, place a mozarella ball in the center of each, then top with another spoon of batter. Once the batter is bubbling in the center, flip and cook another 2-3 minutes. Serve with marinara for dipping.

Note: if you don't have marinated mozarella balls, you can marinate them yourself with olive oil and italian herbs.

November 28, 2009

A belated "Happy Thanksgiving" and Olive Bread

For Thanksgiving this year I was responsible for bread and one drink.

I went a little overboard.

Basically, I couldn't decide what kind of bread to make, so I made them all! The no-knead bread came out beautifully, the best I've ever made. The crust got that lovely reddish brown color and the insides were full of large bubbles. I thought at first that the dough was too wet, but I guess not! I wasn't entirely pleased with my epi wreath - I cut my epis wrong. I knew I was doing it, too, I just wasn't thinking! Bad me! Finally, I made Stacey's Olive Rosemary bread, half as a boule and half as a braided loaf. As a side note, I reduced the amount of olives just to be different. Actually, I was just tired of chopping things up. But it worked out fine, and I'm not a huge olive fan anyway.

Ingredients

1 3/4 c warm water
2 t instant yeast
2 T honey
3 1/2 c bread flour
1/2 c whole wheat flour
2 t salt
1 T dried rosemary
3 oz pitted olives, rinsed, chopped rough, and patted dry

Blend water, yeast, and honey in a medium bowl. Add the flours and stir until dough forms into a ball. Cover with plastic wrap and rest for 20 minutes.

Make a well in the middle of the dough and add the salt and rosemary. Stir briefly, just until the salt and rosemary are mostly mixed in. Turn out onto a floured counter and knead until the dough becomes smooth and tacky. Then pat the dough into a 12x6 rectangle. Press olives evenly into dough. Roll the rectangle into a log, pinching the seam shut. Seam side up, roll log into a spiral. Transfer the dough to an oiled bowl, spritz the top with spray oil, and cover with plastic wrap. Let dough rise until it increases in size by 50%, about 1 hour.

Fold partially risen dough over itself. Turn bowl 90 degrees; fold again. Turn bowl again; fold once more. Cover and let rise 30 minutes. Repeat folding, replace cover, and let rise until doubled in volume, about 30 minutes.

Transfer dough to counter, being careful not to deflate. Divide dough in half, loosely shape each piece into boule, and let rest 15 minutes. For a braid, divide the dough half into three. Form each third into a boule and rest.

Complete the boule, pinching the seam shut. Or, for a braid, roll each third out to form a strand. If the strand isn't staying stretched, let it rest again. Once you have three equal length strands, carefully braid them together, pinching the ends firmly so that they do not seperate.

Transfer loaves to parchment paper or greased pan. Cover with plastic wrap and let rise until doubled in size, 1 to 1 1/2 hours. Meanwhile, adjust oven rack to lower-middle position and heat oven to 450 degrees at least 30 minutes before baking.

Bake 15 minutes, spraying oven with water twice in first 5 minutes, and then reduce oven temperature to 375 degrees. Continue to bake until bread is deep golden brown and instant-read thermometer inserted into center of loaf registers 210 degrees, 25 to 30 minutes. Transfer to wire rack, discard parchment, and cool loaves to room temperature, about 2 hours.


November 19, 2009

Easy Rosemary Bread - Epi Wreath

Next week is Thanksgiving. While we are not hosting this year, we did volunteer to bring some assorted breads and pumpkin pie, and I'll probably be bringing some potatoes as well. Earlier this week I was talking to Stacey about just which bread I should make. While I still haven't answered that question, I did decide during the conversation that I wanted to try a wreath shape. Stacey recommended a test run, so I worked one into my very tight bread-making schedule with this recipe from At the Very Yeast. The author billed it as cheap, easy, and quick - just what I needed for testing out new shapes! Quick it is, for I took this out of the oven less than three hours after I started the dough. That's quick enough to make after work!

The dough seemed dry at first, but it turned out smooth and not at all sticky, which is a nice change from the sticky things I've been working with during the BBA challenge lately. It wasn't quite as smooth as I would have liked, though. I got it close to the windowpane test, formed it into a boule, and set it to rise.

After the first rise, it was shaping time. To make the wreath, I gently worked my fingers through the center of the boule and began to slowly stretch the dough into a ring. I let it rest for about 10 minutes then stretched it again, smoothing it out. After a second rise made the epi cuts. It worked out fairly well, but I think for Turkey Day I'll use a sharper angle.

Really, this bread was so simple I might make it in addition to my other breads for Thanksgiving. All I can say is that there is not going to be a lack of bread at this Thanksgiving Feast!

Ingredients

3 c bread flour
3/4 t salt
1 1/2 T sugar
dried rosemary to taste
1 c warm water
1 package yeast
2 T extra virgin olive oil

Mix the yeast into the warm water and rest until bubbly, about 5 minutes. Meanwhile, blend the dry ingredients in a bowl. Add the yeast mixture and the olive oil and stir until dough forms into a ball.

Turn out and knead until the bread passes the windowpane test, roughly 10 minutes. Form into a ball and place in a lightly oiled bowl. Cover with plastic wrap and rise until doubled, about 1 hour.

Form the dough into the shape of your choice. If the dough is resistant, let it rest for 10 minutes, then continue.

Rise again, about another hour.

Preheat the oven to 400. Bake for 8 minutes, then reduce heat to 375 and finish baking. Times will vary according to the shape of your loaf. The wreath, a thin shape, cooked in 18 minutes while a thicker shape will take closer to 30.

October 24, 2009

The Great Bread Challenge, and some dinner rolls to boot!

I mentioned earlier about the upcoming Bread Challenge. Well, I have my book and I'm ready to begin! For an assortment of reasons, I will be tracking this challenge via my photography blog, Focus. Among other things, I want to keep this one recipe focused. Speaking of, here is a lovely, quick, and easy recipe for dinner rolls that I made the other night, courtesy of cooks.com. No pictures, because they were eaten so fast!

Ingredients

1 pkg. yeast
1 c warm water
1 egg
1/4 c sugar
1 t salt
1/4 c oil
3 c flour

Dissolve yeast in water. Add egg, sugar, salt and oil, mixing thoroughly. Add half the flour, and blend until smooth. Add rest of flour and beat again until smooth. Spoon into greased muffin tins until half full and let rise until doubled. Bake at 400 degrees for 15 minutes.

October 18, 2009

French Bread

So, Stacey over at Magnifico! has issued me a bread challenge where we get a particular book and bake through it one recipe at a time. I, of course, am absolutely unable to ever turn down a challenge, so I agreed and headed out to the bookstore today.

They didn't have it.

Not a huge problem, as there is always Amazon, but darn it, I was so ready to bake some bread! So I went home and trolled the internet for some recipes to try. This french bread recipe comes from allrecipes.com. It has also received the stamp of Manproval! from my husband. The loaf pictured above is the garlic bread version.

INGREDIENTS

2 packages active dry yeast
1/2 c warm water
2 c water
6 c bread flour
1 T salt
1 T sugar
2 T vegetable oil
3 T olive oil
2 T cornmeal
1 egg white, beaten

In a large bowl, dissolve yeast in warm water. Let stand until creamy, about 10 minutes.

Add 2 c water, 3 c flour, salt, sugar and vegetable oil; stir well to combine. Mix in the remaining 3 c flour, 1/2 c at a time, beating well after each addition. Leave spoon in, let rest 10 minutes.

Stir the dough vigorously, let rest 10 minutes. Repeat four more times.

Divide dough half. Knead lightly (less than a minute) and roll each half into a large rectangle. If the dough is difficult to roll, let it rest for a few minutes. If you want to stuff the bread, spread your toppings on now. Roll up the dough, starting at long edge. Seal edges and place seam side down on a large baking sheet that has been sprinkled with cornmeal.

Use a sharp knife to slash each loaf diagonally 3 times. Brush with beaten egg white. Cover and allow to rise 30 minutes. Meanwhile, preheat oven to 400.

Bake for 35 minutes, or until golden brown.

Fillings:

- Brush with garlic-infused olive oil, oregano, and Italian herbs for a nice garlic bread.

- Layer mozzarella and pepperoni for pizza rolls

Pumpkin Bread with Chocolate Chips and Lingonberries

It's fall, which means pumpkin time! We stocked up yesterday at the grocery store and of course I had to use some right away. This recipe is easy and tasty - I especially like the addition of the lingonberries. Of course, they're from my own back yard, so I'm emotionally attached to them as well. The only downside is that I don't have any left anymore! Next fall I need to gather lots more. Thanks to Mom2Mom for the basic recipe.

After some questions, I realized I forgot to mention that you can easily substitute cranberries for the lingonberries.

Ingredients

3 1/2 c flour
2 t baking soda
1 1/2 t salt
2 t cinnamon
1 t nutmeg
1 t ground cloves
1/2 t chai spice blend
3 c sugar
1 c oil
2/3 c water
4 eggs
2 c pumpkin
1 c lingonberries
1 c chocolate chips

Preheat oven to 350. Mix the dry ingredients together in a large bowl. In a smaller bowl, blend the wet ingredients together. Slowly add the wet to the dry, blending well. Stir in the berries and chocolate chips.

Baking times:
muffins: 30 minutes
loaf pan: 1hr10
8x8 pan: 1hr

September 6, 2009

Pizza, pizza!

So, after seeing my friend's delicious pictures of her pizza posted all over facebook, I hopped over and borrowed her dough recipe from her blog over at Magnifico! and made myself some pizza and cheese sticks. I really need to restrain myself when it comes to the cheese, and endeavor to get a thinner crust, but it came out quite nicely. Now I need to convince the husband to buy me a pizza stone or two!

Pizza Dough
Ingredients
3/4 c warm water
1 t active dry yeast
1 c whole wheat flour
3/4 c bread flour
1/2 t salt
1 T olive oil
1 T honey
dash of oregano

Mix the water and yeast in a small cup - set aside for 5 minutes to proof. In a bowl, blend together the flours, oregano and salt. Stir in oil, honey, and the yeast mixture. A dough should form, sticky but not damp. Turn onto a lightly floured surface and gently knead for a few minutes. Form the dough into a ball and place it seam-side down in a clean bowl. Cover and set in a dry, warm place to rise approximately 1 hour.

Turn back onto floured surface and knead for about 30 seconds. If you want two smaller pizzas, pull the dough in half and form two balls; otherwise just form one. Leave on the board and cover. Allow the dough to rise again for 1 hour and 30 minutes.

After the first 30 minutes, preheat the oven to 500.

Once the dough has risen, gently stretch to the desired shape and thickness. Add sauce and toppings and bake for 10 minutes.

Sauce
Ingredients
4 parts tomato sauce
1 part pesto

Blend the two together and spice to taste.


Toppings
Let yourself go crazy! I used some roasted chicken and five different kinds of cheese.